Connect Elementor Form to Google Sheets for Free!

This post started after we created a Webinar signup page, with a question registrants could ask upon signing up. However, we wanted to collect all the questions from the submitted forms in a specific Google Sheet document to follow later follow all questions. I figured it's not this easy to Elementor Form to Google Sheets. By the way, if you're creating Webinar landing pages make sure to improve conversion with AI 🙂
Initially, I believed it would be a short and easy task that would take me 5 minutes. Only later did I discover how tricky this was… But I've got you all covered in this post.
Elementor Form to Google Sheets in No Time
If you want to go the straightforward path, you can connect Elementor Form to Zapier. Respectively, it will cost you $20 per month. In this article, I will show how we did it for free and saved hundreds of dollars!
How to Connect Elementor Form To Google Sheets?
Google Sheets allows us to add code to our sheets and deploy this code as a webhook even better. This means our code gets a unique URL that can be triggered externally by our Elementor Form post submit action. The webhook allows us to create the required connection between Elementor Form to Google Sheets, and we're done! The following steps will describe everything you need to know.
1. Create a new Google Sheet document

Include the table headers you wish to have in the document. Otherwise, your message from the Elementor Form will not reach correctly in your Google Sheet.
2. Open Scripts Editor for Google Sheets in the Top bar
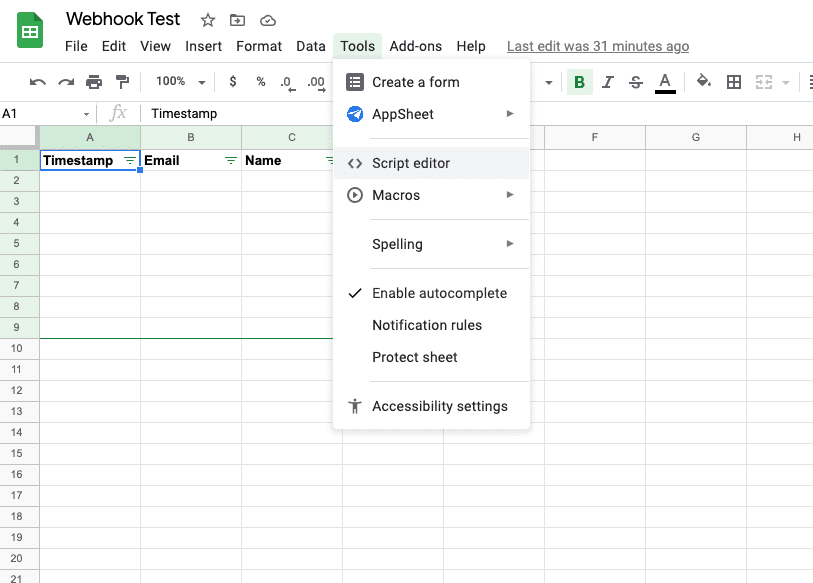
Here we’re going to write the code for our webhook and integrate it with our document to connect our Elementor Form to Google Sheets.
3. Paste the code into the Script Editor
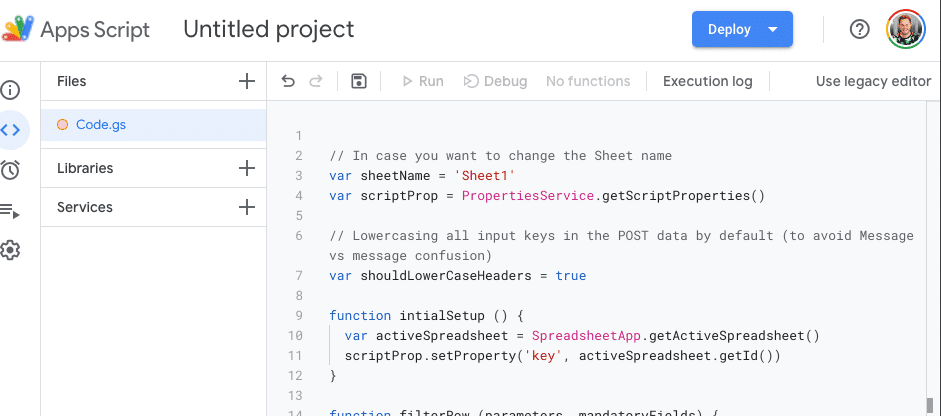
Override the default myFunction() with the code you can find here, and then copy everything and replace it.
4. Save the Code and Create a new Deployment
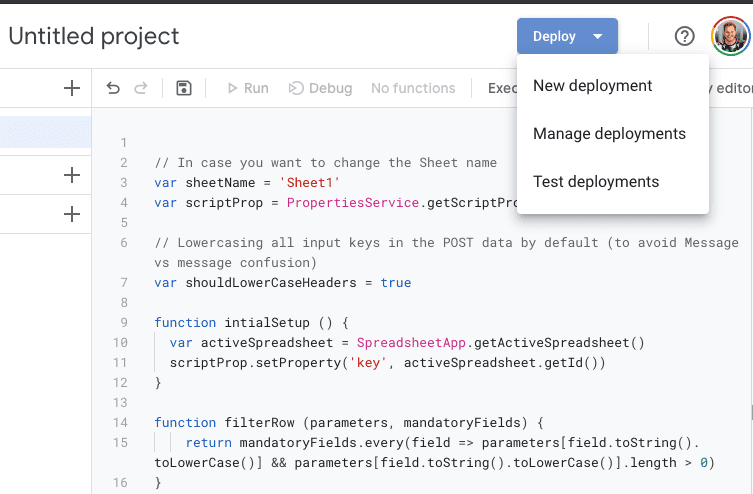
Save the code to make sure you don’t lose anything. Only after saving will you be able to deploy your code.
5. Choose Deployment Type as Web App
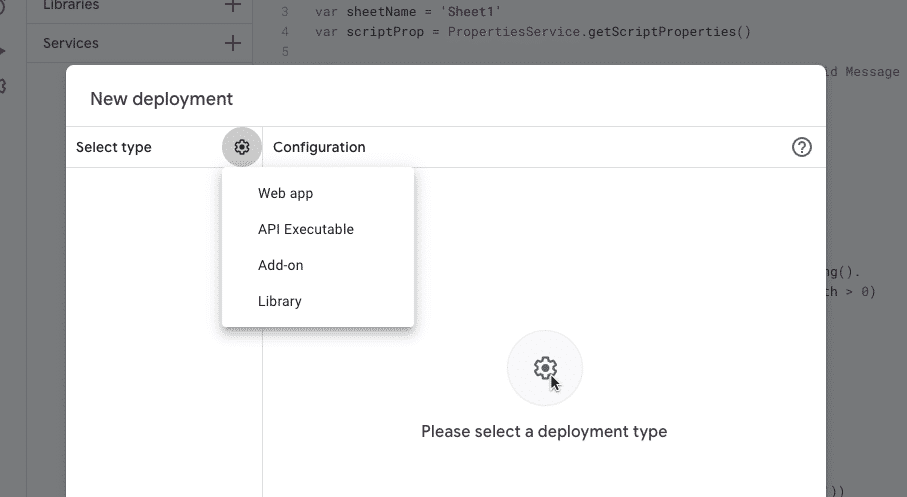
Give your Web App a convenient name that you can recognize.
6. Set Execution permission and Allow Access
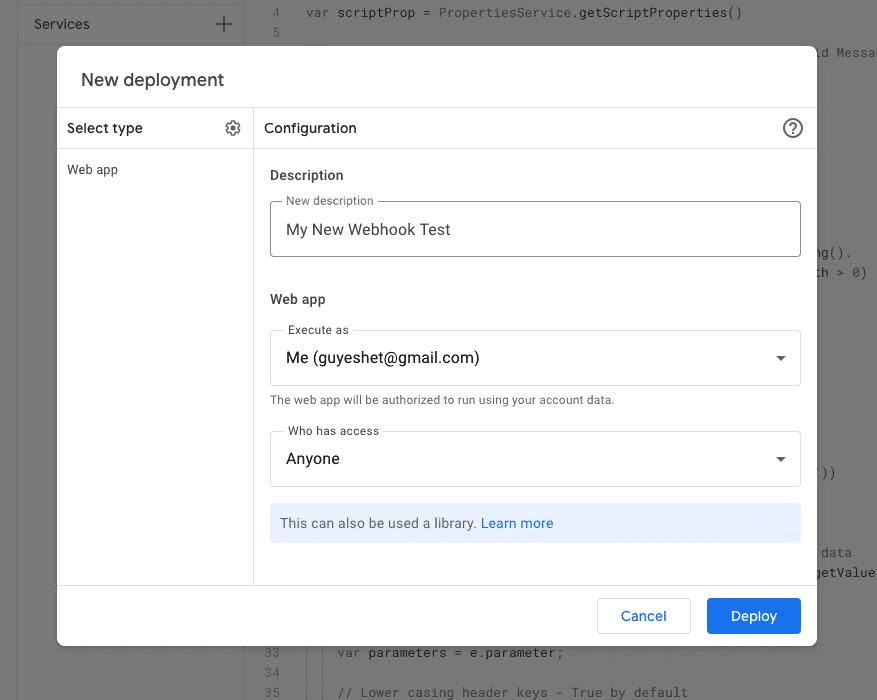
Execute the Web App from your user and give Anyone access. This would make your webhook public.
It is important to remember – that this URL is available to everyone.
7. Authorize Access to the Web App
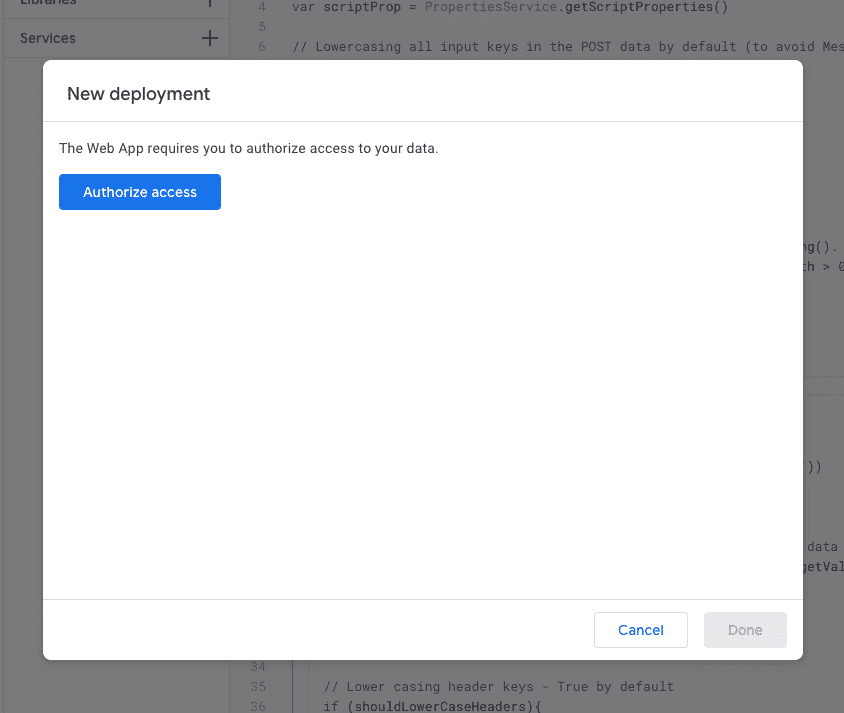
Once you choose a Web App – click deploy again. You will now be prompted to Authorize access and let the script operate on your behalf. Important to make this work. Otherwise, the script can’t access your Google Sheet.
8. Run the initialSetup function
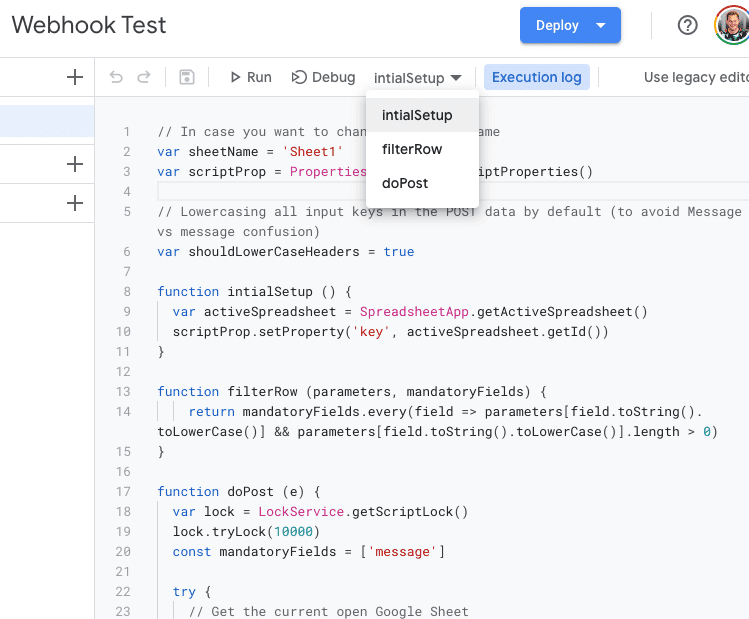
Important Step!
Run this only once before starting. This tells the script to work on the given Google Sheet.
Choose the initialSetup on the top menu and click Run.
9. Define a Trigger in Google Sheets Script Editor
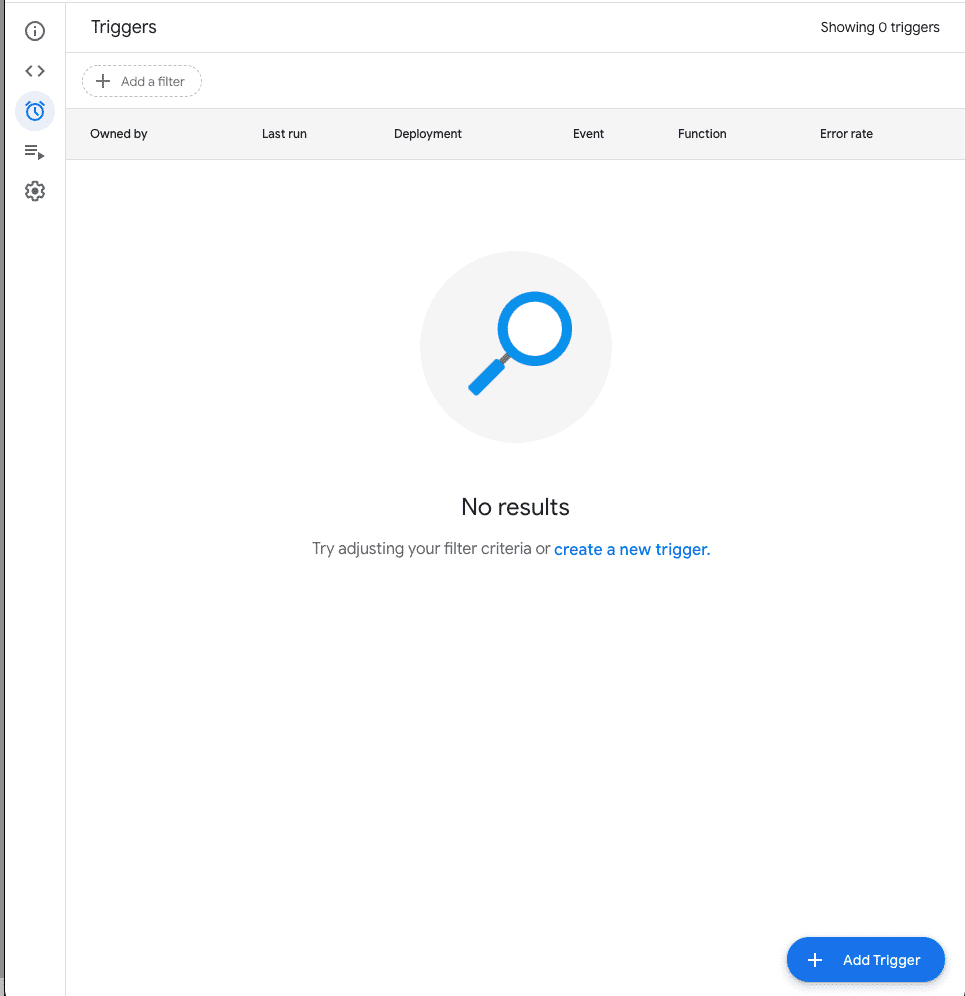
On the left menu, click the “Clock” icon that says triggers. We need to tell the script when to operate.
Click Add Trigger on the lower right corner of the screen.
10. Choose Function to run and Event Type

We need to change two fields:
Choose Function to run: doPost
Choose Event Type: On form submit
Once chosen hit save and continue the process 🙂
11. Copy your Web App URL to Elementor
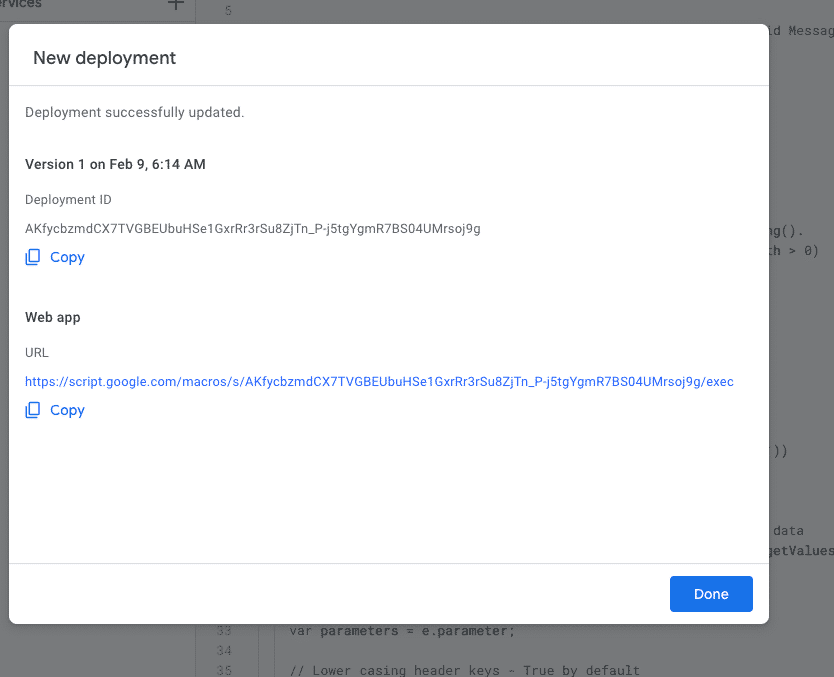
This URL is your Webhook URL – the one we will set in Elementor and define as our webhook. If you need to test anything – this is the URL you want to use!
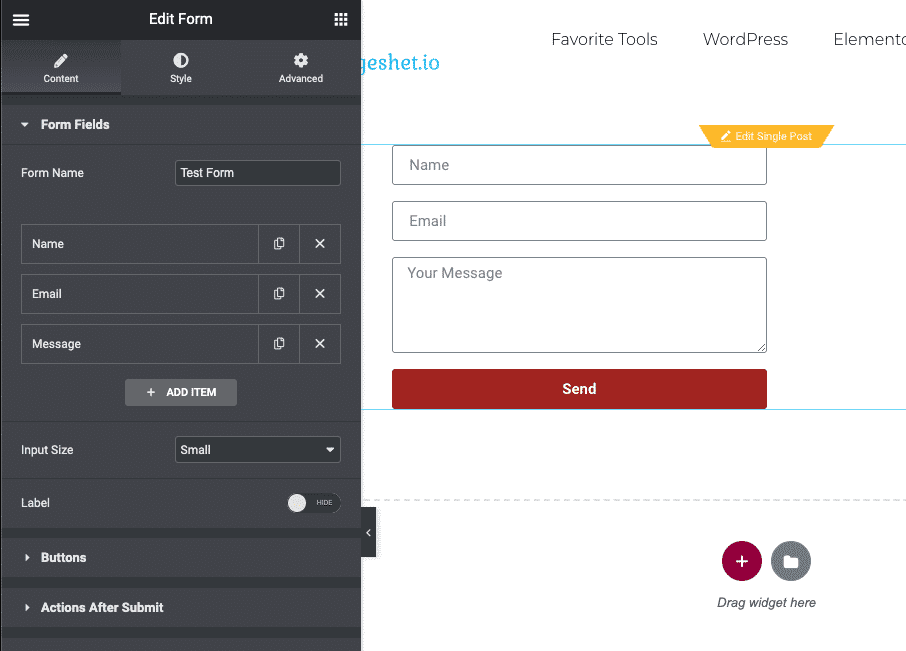
12. Set field label names
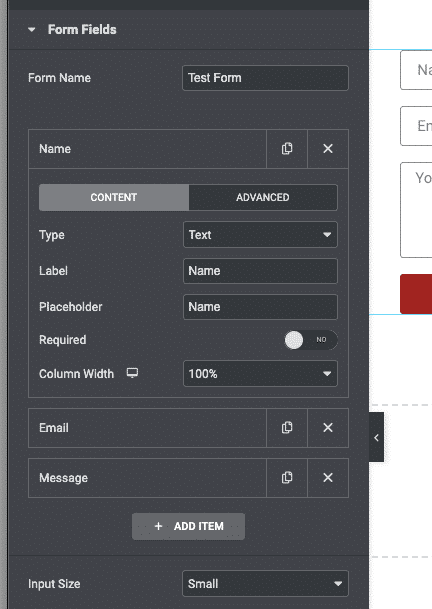
The names we give the field labels are the names of the fields in the Webhook! This means that the data Elementor sends to our code in Google Sheets has the label’s names. They must match the code (but not case sensitive, for example, Message and message work).
Leave as default (Email, Name, Message) to work with the example code.
13. Define Actions After Submit with Webhook
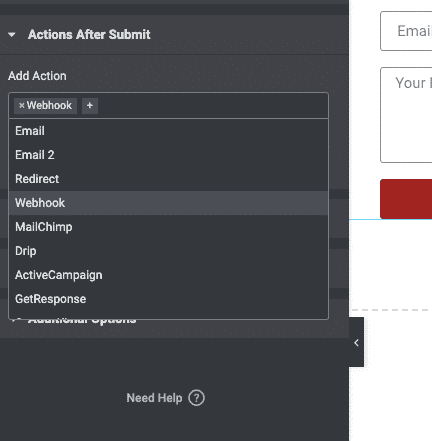
Choose this option from the dropdown in the Actions After Submit dropdown menu.
14. Paste the Webapp URL we copied in the Elementor Form
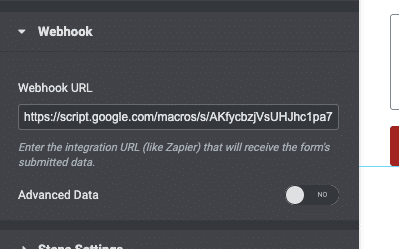
Now it’s time to take the URL we received previously from our Google Sheets deployment and paste it here. This tells the Elementor form to send data to this address once a form is submitted and connects Elementor and Google Sheets.
Don’t tick “Advanced Data” – It is not necessary for this stage. It just sends an extra field in the webhook, which we don’t currently need.
15. Create a new Elementor Form
Choose the Elementor Form from the Elementor Widgets menu.
16. Save the Elementor Form and try to submit data!

Update the file and open it in preview.
Important – Form submission does not work while editing. You must go to preview mode to test it.
17. The Final Result - Elementor Form Connected to Google Sheets!
Go back to your Google Sheet and enjoy the results! You should now see your entry from the submitted form here.
We successfully managed to connect Elementor Form to Google Sheets!
// In case you want to change the Sheet name
var sheetName = 'Sheet1'
var scriptProp = PropertiesService.getScriptProperties()

// Lowercasing all input keys in the POST data by default (to avoid Message vs message confusion)
var shouldLowerCaseHeaders = true

function intialSetup () {
  var activeSpreadsheet = SpreadsheetApp.getActiveSpreadsheet()
  scriptProp.setProperty('key', activeSpreadsheet.getId())
}

function filterRow (parameters, mandatoryFields) {
    return mandatoryFields.every(field => parameters[field.toString().toLowerCase()] && parameters[field.toString().toLowerCase()].length > 0)
}

function doPost (e) {
  var lock = LockService.getScriptLock()
  lock.tryLock(10000)
  // Uncomment and add fields which must be mandatory when submitting a form
  //const mandatoryFields = ['questions']
  const mandatoryFields = []

  try {
    // Get the current open Google Sheet
    var doc = SpreadsheetApp.openById(scriptProp.getProperty('key'))
    var sheet = doc.getSheetByName(sheetName)

    // IMPORTANT: Create headers in your google sheet first
    //            If you dont create headers this won't match the data
    var headers = sheet.getRange(1, 1, 1, sheet.getLastColumn()).getValues()[0]
    var nextRow = sheet.getLastRow() + 1

    var parameters = e.parameter;

    // Lower casing header keys - True by default
    if (shouldLowerCaseHeaders){
      Object.entries(e.parameter).map(([key, value]) => parameters[key.toString().toLocaleLowerCase()] = value)
    }

    const shouldInsertToSheet = filterRow(parameters, mandatoryFields)

    if (shouldInsertToSheet){
      var newRow = headers.map(function(header) {
        return header.toString().toLowerCase() === 'timestamp' ? new Date() : parameters[header.toString().toLowerCase()]
      })
      sheet.getRange(nextRow, 1, 1, newRow.length).setValues([newRow])
    }

    return HtmlService.createHtmlOutput("post request received");
  }

  catch (e) {
      return HtmlService.createHtmlOutput("post request received");
  }

  finally {
    lock.releaseLock()
  }
}
If you're looking for more great tips about Elementor, make sure to check out the full Elementor Tips list on the site!